Saturday, January 18, 2014

Short and Sweet Post - Soil Sheet and Measurement news

Hello ladies!
This is going to be a very short and sweet post... I have not posted any picture of myself before because I try for this blog to be related to my teaching and educational resources only. However, I wanted to share with everyone our happiness and blessing... My husband and I were trying for a while to get pregnant, but things were getting a little bit more complicating... However, God has blessed us with a beautiful baby girl that keeps surprising us every day:)
I am 24 weeks and I wanted to share a couple of self pictures... Despite of the sickness and craziness that this pregnancy has brought me, we are so thrilled and I excited to meet our daughter in May... I would do it all over again... well... maybe not the first trimester ;)


Nowwww.. going back to a school topic!
We have been talking about measurements this week in school. We looked into the customary and metric system. As an activity, I selected different items in the classroom that my students had to measure in both inches and centimeters. They all record their measurement on a two-window foldable that were glued onto their Math journal. Here are some pictures of my kiddos in action! :)


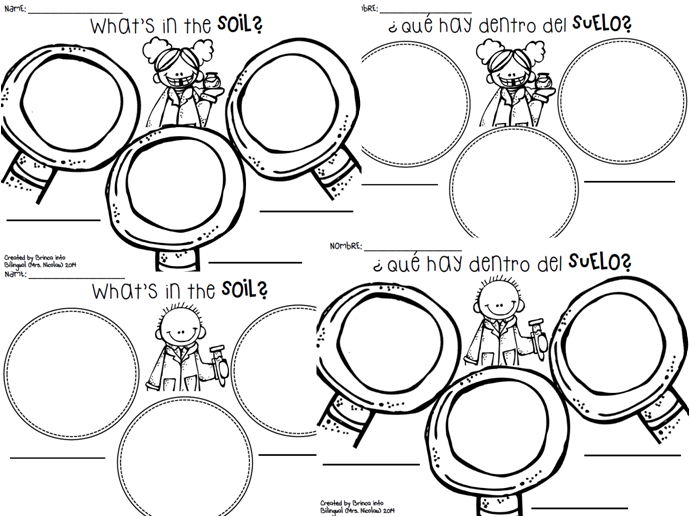
In Science we talked about soil and weathering. We looked into what soil contains and how this is also formed by different layers. Here is our hands-on activity; students are sorting all the different matter found in the soil (humus, rocks, and material left behind by living things).

 
Students draw their observations on these sheets. If you would like a copy, they all come in Spanish and English version :) Just click on the picture or HERE to take you to my sharing docs.
 
https://drive.google.com/file/d/0B1bGT5IvwAdWOWVEcHZZSWVBcVk/edit?usp=sharing
 
Well my friends, like I had said.. this post was going to be short and sweet! Enjoy your three-day weekend!! :) I will see you next week with more news and new ideas!!


Sunday, January 12, 2014

Take it easy.. grab a Freebie!! :) Place Value and Penguins Craft

Hi everyone!!! Soooooo... How was your first week of school?!
Well, mine wassss... Oh boy! what a mix of behaviors and new challenges!!! The first two days were like my students ate a bunch of knowledge over the break and I couldn't have enough of it!!! You know one of those days that you want more and more of it... Then, everything went who knows where! They were tired and when that was not an issue, they were being "too social"... It definitely didn't feel like a short week...
However, we got a chance to review some place value skills, finish up our TEK of earth's changes (we started before the Christmas break talking about volcanoes), and do some area skills.

We didn't get to do much with Earthquakes and Landslides, but just writing facts and doing a demo of an earthquake. However, I did incorporate the skill of Cause & Effect since I heard from my co-teacher that our students need more of this concept :)
So here's a picture of an anchor chart I did in order to incorporate it:


Because I feel that I have not been doing so well on creating new products, I decided to post my latest games and activities as Freebies. Who doesn't like to get stuff for free?! I know I DO!! :)

So here is my first creation, perfect for a winter theme! It is a Penguin Craft that can go perfect with any writing, list of facts, or anything that you would like to!

Click HERE to take you to my TPT product...


Also, this is the activity that I did with my students on the first week we were back from Christmas break. We did a place value review up to Hundred Thousands place; However, I created this product so younger grades can also use it. For more information on how to use this activity, download my product on my TPT store.
Click HERE to take you to my Place Value product...

Well it's time to finish that load of laundry my friends! I hope your weekend has been restful and peaceful! Always wishing you a good school week!! :)
Thank for stopping by my blog, stay tuned!

Monday, January 6, 2014

Better late than never!! Volcanoes, Christmas party, and freebie tags

So it's been wayyyy too long since my last post, but as you know the last week of school before Christmas it's CRAZY!!!! Not to mention lesson plans, grades, and a family trip out of town... Now we are back to a warmer weather in Texas! We get back tomorrow with a training and Tuesday I'll be seeing my monkeys again :)

Before I share with y'all my trip, I wanted to refer back to my Landforms post; I added more pictures and a couple more activities to it, click on Landforms please :)

On the last week of school before Christmas, we talked about volcanoes and did a fun/quick experiment to observe how volcanoes erupt. Here is a picture of our foldable:


For our Volcano experiment, we just added baking soda, food coloring (red and yellow to make an orange lava color), and vinegar... My students first built their volcano with play-dough; then poured vinegar into the hole (each group had a mini cup containing vinegar), added two drops of yellow and red food coloring, and at last added two tea spoons of baking soda.


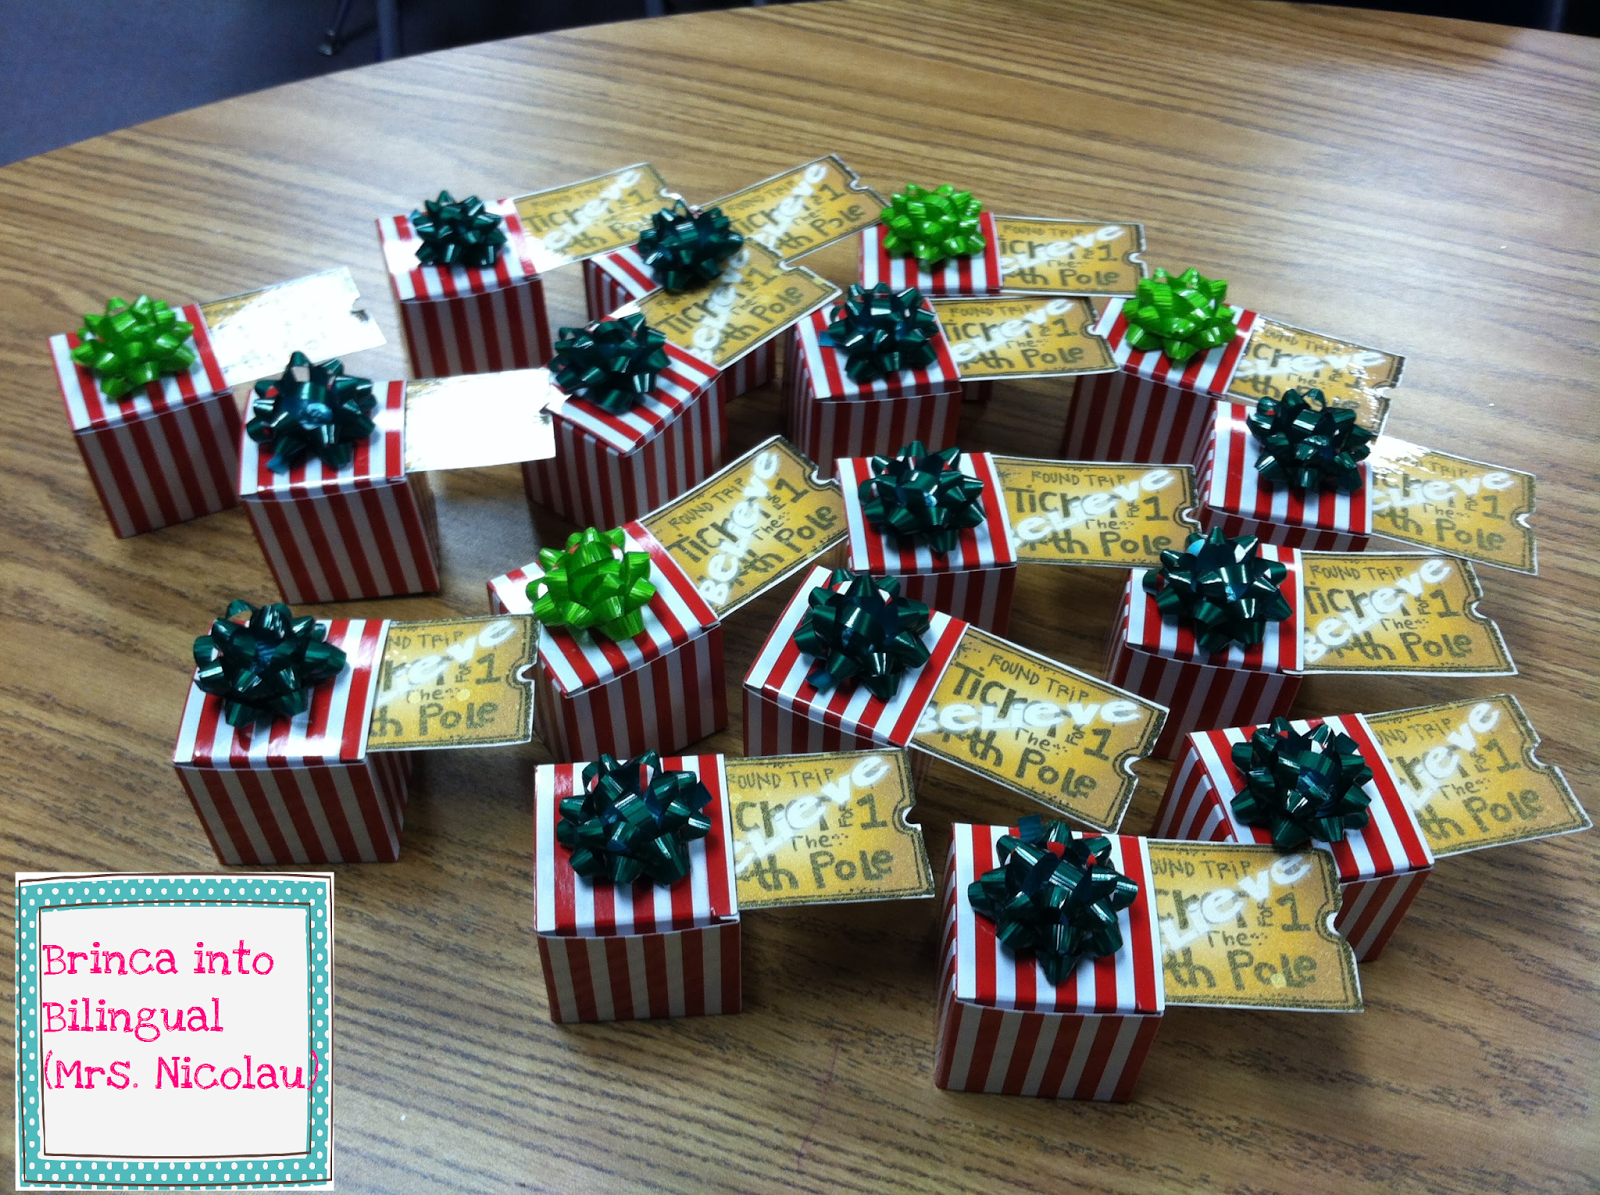
For our Christmas party, we watched "The Polar Express" and I gave a couple gifts to my students. They automatically recognized the box by saying "just like in the movie!" They all loved the little box and I think it turned out super cute! :)


I purchased the mini boxes from Oriental Trading; here is the link to the product in case you would like to check it out! Click HERE


I purchased the mini bows from Wal-Mart and I made the tickets myself. To make the tickets look more sparkly I bought a spray bottle from Michaels. Here is a picture of the bottle and it is called "Color Shine" and it's basically a spray that gives a sparkly look to the paper...


I also made these mini bags that contain hot chocolate bags and mini marshmallows:


You can download for FREE both tickets and tags on my TPT store, click HERE to take you to my TPT product.
 
Remember my post on recycling construction paper? Well, we finally got a chance to use the paper! We made small Christmas cards with it and they turned out super cute! :)


If you would like to see my post on recycling paper, click on the following link:  Natural Resources & Recycling Activity
 
 
I just wanted to share with you before I leave what I did over my Christmas break... We spent all my the break in VA and MD. Before I got married, I used to live with my mom in MD so when I moved to Texas, she moved to Virginia. My husband's family live in Maryland as well, so we were going to these two states the whole time.
It's been long, long, too long since I have been in a descent snow day, so my sister and I have been praying for some snow... whatever the amount, a lot of it or just a little bit of it.. at least before we both leave Virginia.... So we got some! Here is a collage picture of how my mom's neighborhood looked after it stopped snowing:

We were so happy!! At least we got to enjoy the VERY cold weather for a day :)

Well, this is it for me! It is resting time for this sleepy bear! ;) I hope you had an awesome break and I wish you a fabulous first week of school!
Thanks for stopping by my blog, stay tuned!! :)


Saturday, December 7, 2013

What we have been up to this week... Landforms + FREEBIE!

Hi everyone!
I hope you are enjoying your weekend! Here in Texas, the weather has been CRAZYYYY!!! Temperature has dropped below the 50F, and that's too cold for this Peruvian teacher!! You would think I would be OK since I have lived in Nebraska for a year and 4 years in Maryland...However, this South American teacher got too use to of the warm Texas weather ;) We have been around the 20s and 30s in Central Texas, so consequently I have been eating soup and drinking hot chocolate!
It was raining in low temperatures yesterday, so I took some pictures of how freezing this poor city looked like!


Now, back to school!! :) We have been talking about landforms the past week during Science... We will also be working on landforms next coming week, so I'll be posting more pictures of other activities by next week...

First, we have talked about different examples: Mountains, Hills, Valleys, and Plains. We wrote the meaning of each word with examples and non-examples in our journals.

We also created a construction paper representation of each landform; here are some pictures of my students work and I've posted a picture of my master sample. I saw a picture on Pinterest (Click HERE to take you to the picture I found) and decided to make my own since I added a few more details and I included the landforms we were learning. I honestly show them how to cut their own without any pattern; However, if you would like a copy of what we did, I have posted a FREEBIE on my TPT store... I included the landform vocabulary words in Spanish AND English... click HERE to take you to the product :)


For our lab day, students were working in groups and built a sketch with play-dough. Before we started, we reviewed each landform and its characteristics. Then I advised them to use a specific color for each landform. However, I reminded them that this was their project and they had to decide as groups. I did not tell them how to make the mountains or any landforms, I basically check around if they needed more guidance and let them take ownership for their own work. They were soooo engaged and were working soooo well in groups that made this activity so smooth :)
Here are some picture of their work as they are putting it together:


On the second week of landforms, we add a little bit of sweetness to our project. I have looked on Pinterest several pins with different ideas, so I combined those ideas to make our own landform activity. We used Graham cookies, green frosting, light blue frosting, M & M, fish sprinkles, and Hershey Kisses. As the play-dough activity, I let my students decide how to create their landforms, as long as they include the landforms we have been learning about.


At the end of the week, we also compared Hills and Mountains by creating a Foldable that contained a Venn Diagram. We wrote similarities and differences in between these two landforms. Students worked in partners writing their draft on a paper and then, creating a final product on this foldable.


Hope you find these lessons helpful and you would be able to use them in your classroom as well :)
Thank you for stopping by my blog, see ya next time! Stay warm if you are in Texas or another state that have cold weather during these days! :/


Be sure to check other Freebies on 
TBA (Teaching Blog Addicts) for Friday August 28, 2015.


Sunday, December 1, 2013

Natural Resources & Recycling Activity

We have been working very hard on problem solving during two weeks now... I honestly don't have any new activity for this, but just practice, practice, practice! We have been practicing all of our strategies and looking at some key words to identify a plan for our word problems.

On the other hand, for science we have been working on Natural Resources...
We started the unit by introducing all our vocabulary words; we usually take a class period to introduce and talk about the vocabulary words. My school has an account on Brain Pop so I also play a short video. My students LOVE LOVE Brain Pop, so I try to find videos on that website. We talked about Natural Resources, helpful products, ways to preserve our natural resources (Recycle, Reuse, and Reduce).

We read a VERY basic book about Natural Resources vs. Man-Made and this seemed to help my students to really understand about Natural Resources and products.


We also created a foldable to write examples of Natural Resources and products that come from those examples.


As our experiment we recycled paper! I found the activity on a link, click HERE to see it.

We first tore all 4 different construction paper in small pieces and mix them up on a tray.

We then place the construction paper in a blender, add water, and scorn starch and blend it all together.

 
We then, place the mix on a tray and spread it.., then, with a sponge we took all the water we possibly could take so the paper could dry faster (it took about two days to dry)...


These pictures show how the recycle paper look after it dried completely (it actually took more than a day, I am thinking it took so long because the paper turned out to be very thick).


We couldn't use these on time for our Thanksgiving Thankful cards, but we will sure use them to make some Christmas cards! (Click on Recycle under Labels to see more).
 
I hope you guys had a restful Thanksgiving! I was planning on doing lots of things, but I only slept and ate! hahaha ;)
 
I will be posting new things by the weekend again!! Thanks for stopping by my blog :)